|
| Kayaks,
Water, and DSLR Cameras - How I Manage Mine |
One of the purposes I have planned for my kayak is wildlife photography, knowing
there are tight places that even my 10-foot duck boat (sneak boat as some call
them) wouldn't do so well in with a trolling motor on it. Sometimes paddles are
the only option. But when you take $5000 to $10,000 of pro camera equipment and
add water, well, you're asking for a disaster if you are not careful and prudent.
My duck boat is the same length as my kayak, but it's a foot wider, and so stable
I can stand in it and pole if necessary. Yet, I still wear a PFD in it, and I
won't take my largest lens in it. The lens is heavy, and difficult enough to handle
on dry land. I'm not about to try fiddling with it on the water in something the
size of a kayak. So, I've limited myself to using smaller lens that I can handle
easily, the largest of which is a 300mm f/4 with a 1.4x teleconverter. Besides,
the whole purpose of using the boat is to get close enough to the subject that
I don't need to use the longest, heaviest lenses in the first place.
So, now that we have the cameras in the boat, how do we handle them? Waterproof
hard cases are great for general transporting, from point A to point B. But when
you get there and want to USE the cameras, hard cases are a pain. It certainly
doesn't work inside a kayak any more than bringing your change of clothes in a
suitcase would work in one. You use a soft dry bag for that. It can be shaped
to fit wherever you need to stuff it. Your camera equipment has to be just as
accomodating when in a cramped kayak. And let's go ahead and get over the argument
that a dry bag is not guaranteed to keep a camera or anything else dry if dumped
in the water. If I really thought I was going to get dumped into
the water, I wouldn't be in the boat myself, much less put my camera
equipment in it. Yet, I wear a PFD as a precaution. SO, being reasonable, I don't
expect my camera gear to get dumped into the water either, BUT I still try to
protect it as reasonably as I can, which means a dry bag. If you don't buy my
argument to this point you don't need to read any further.
Ah, I see you agree. Okay, so in the beginning I was wrapping
my telephoto lens in a towel to cushion it a bit before I stuffed
it into my dry bag with the spare clothes and drying towels,
and then on top of it all I set my camera with a wide angle
lens attached. The dry bag sat between my knees, and I'd unbuckle
and unroll it to get to the camera for a few shots, then put
it back and roll the bag up again. Not the quick-draw I'd like
it to be, but I managed. Still, I wanted more padded protection
for the equipment for one thing, and for another, I never actually
tried changing the lens while in the boat. It was just too much
trouble, and too slow. By the time I could have gotten the lens
changed, whatever skittish bird I was hoping to photgraph would
have been gone anyway. It pretty much defeated the purpose of
taking along the telephoto to start with. The solution to both
problems? . . . a padded pack that would hold two camera bodies,
one with the wide angle zoom, and the other with a telephoto
zoom or a long telephoto prime. That way I could swap cameras
instead of swapping lenses - Just put one away and pull out
the other.

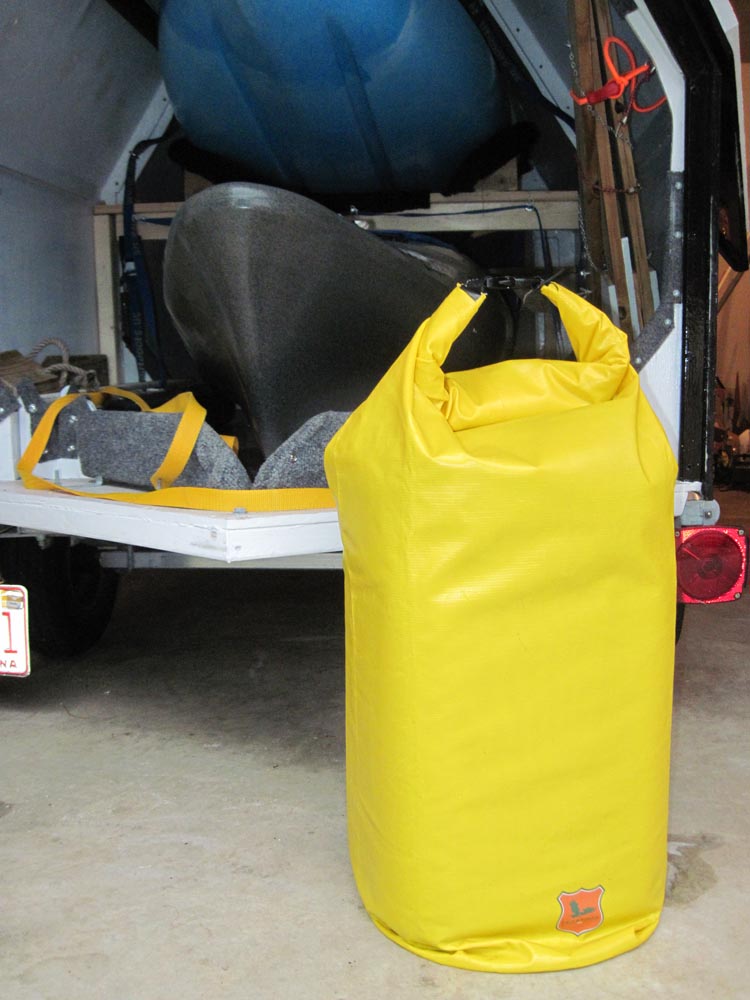
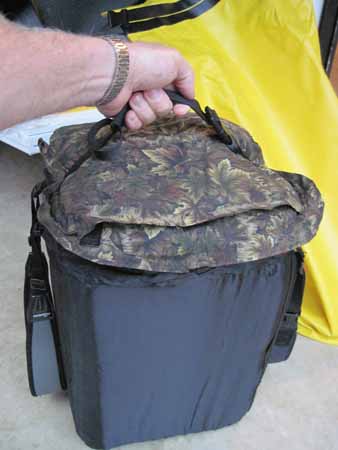
The 54 liter Field and Stream
Dry Bag with the foam camera pack inside.
I lucked into some large pieces of dense gray packing foam from some new electronic
equipment being installed where I work, and I grabbed all of it I could get before
it got thrown into the trash. By hot-gluing three chunks of it together, I got
a piece large enough to use for my project.

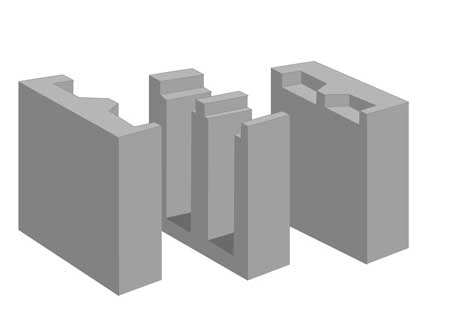
Each foam block was the right thickness to match the diameter I needed for the
lens slots, so instead of trying to cut round holes, it made perfect sense to
just cut two slots the same width as the block thickness. You can see this in
the diagram below. I notched out the top of each slot a bit wider to fit the camera
body.

These slots are deep enough that I could shove my 300mm with teleconverter in
with the camera body attached. Either hole would accomodate the longest lens,
therefore, it would be quite sufficient for anything shorter as well. Then I notched
the two outside foam blocks to fit the camera body as well, so that when the blocks
are put together, the notches are just right for the cameras.
Next I hot-glued the three foam blocks together into one unit.

Then I sewed black nylon tubes to line the holes, a transition
piece to line the camera body notches, and an outside cover
for the whole foam block assembly. These nylon coverings were
all sewn together to line and cover the unit. It's essentially
like the inside of a hard camera case with the foam cut to fit
your equipment, except the foam is put into a soft case (the
dry bag). With the holes and the block lined with this black
nylon just like many camera bags, it makes it soft and very
slippery so the lenses slide in and out silky smooth and easy.
The gear is protected from scratches and bumps, while the whole
thing slides snuggly down into the same 54 liter dry bag I was
putting the gear into before with only towels for protection.
The nylon covered foam camera
pack with lid and lid pocket, showing nylon web strap and snap
buckle serving as a handle. Those are the camera straps hanging
out on the sides.
I sewed a nylon web strap that wraps from the top, then down around the bottom
and up to the top again, and put buckle clips on the ends. This clips over the
padded lid to keep it closed and holds the cameras safely in. It also provides
a handle to carry it with, and gives me something strong to pull the pack out
of the dry bag without tugging on the nylon covering itself. I even sewed a padded
pouch on top of the lid to carry small things like spare batteries, filters, lens
cloth and such. The accompanying photos show all this well enough that you can
get the idea, so I'm not going to go into detailed instructions for this. Whatever
materials you come up with to make something like this for yourself will be different
from mine anyway. The whole purpose of this is simply to show how I solved my
problem, and hopefully provide you with food for thought on how you can do something
similar to work for your situation and your equipment.
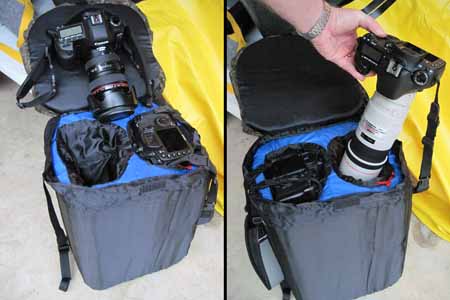
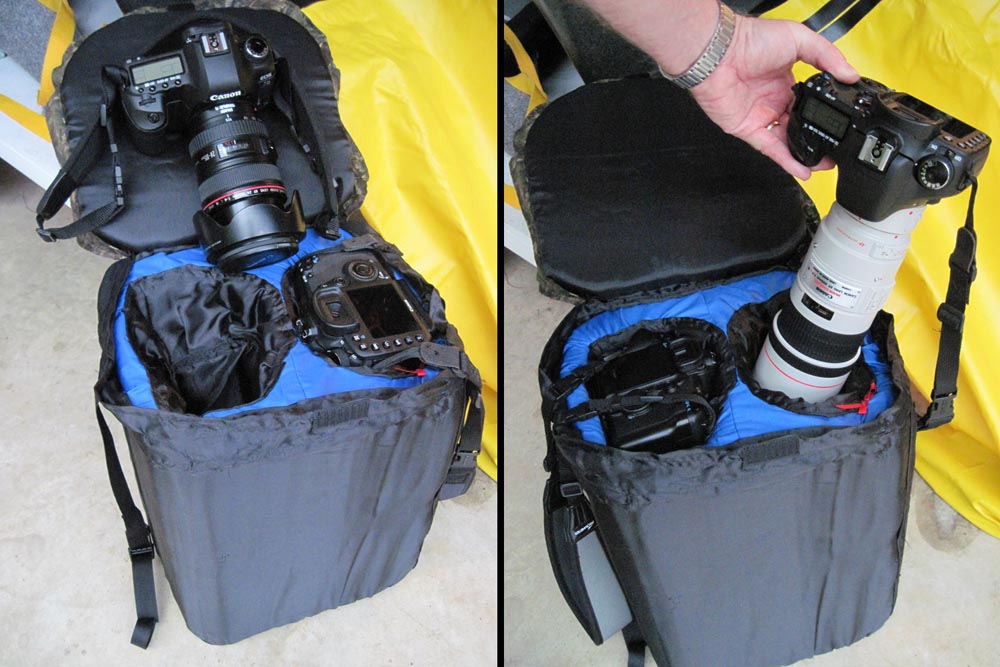
This shows one body with a wide
angle zoom from one pocket, and the long telephoto and camera
from the second pocket.
Now I can set this dry bag between my knees just as before, but it will be easier
to slip out one camera or the other to switch from wide angle scenery to those
telephoto wildlife shots I'm after. I don't have to hassle with swapping lenses
on the body, and it will all be padded and protected when handling to load and
unload the kayak and equipment. It's essentially my waterproof camera bag.

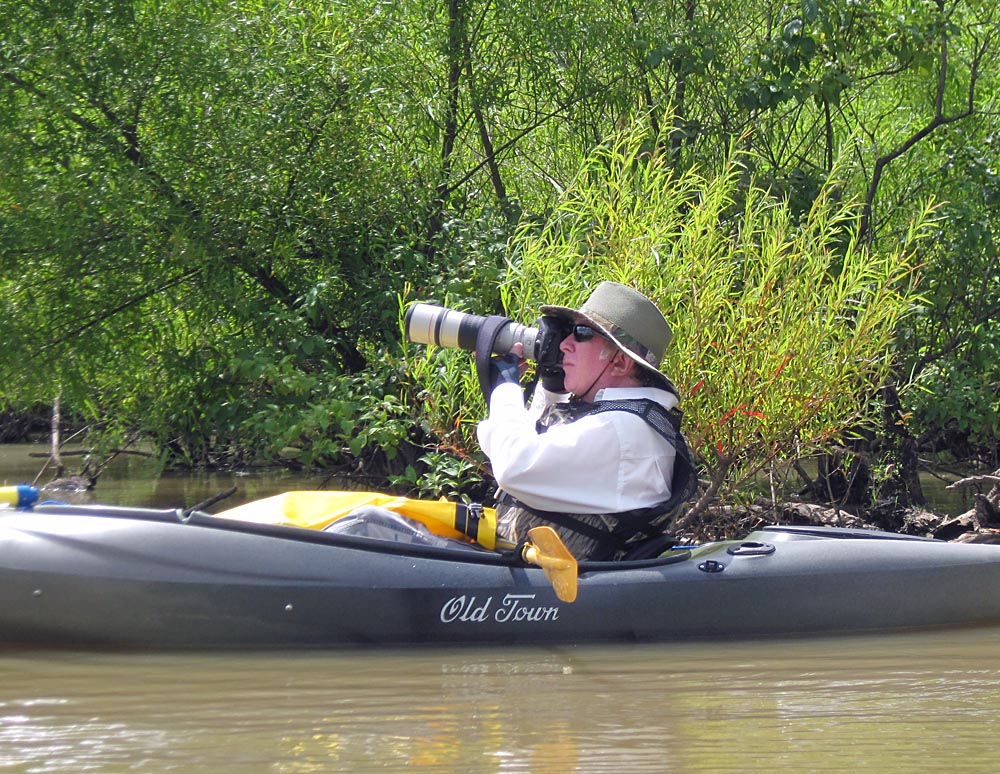
The camera pack in use on Jordan
Lake.
Now, that brings up another question I want you physics and science folks to answer
for me. I always read that you should compress the air out of your dry bag before
rolling and clipping it shut. I can understand the logic behind this, as it makes
the bag as small as possible for packing away into the smallest space. However,
this foam pack is not going to compress, and is, in fact, a very snug fit for
the bag diameter-wise. So follow me here - my logic in this case is to NOT press
all the air out before sealing it up. Why? Well, from what I understand of physics,
atmospheric pressure and all that good stuff, it would seem that a "vacuum" inside
a dry bag (which is essentially what you get [lower air pressure anyway] when
you compress it and then seal it) would tend to suck in water if there was a leak
(poor seal). But, with the air a little compressed inside the bag when sealed,
the higher pressure inside the bag would act to keep out any water trying to leak
in. The only way the water can get in is if the air gets out first. On top of
that, more air inside the bag would make it more bouyant like a cork. Thus it
would float better if it should get into the water. Hopefully, the foam will add
to the displacement volume to increase bouyancy as well, and the weight of the
camera equipment would tend to bring the bottom of the bag down into the water
while the air on top would hold the bag upright. Wouldn't that make it less likely
to get water inside? Of course you must let some of the air out before you can
even have room to roll the top at all, but you would roll it as far as possible
until what air there is gets compressed firmly.
Here are a couple of related articles from my wildlife photography web site:
"If you're not paddling, you're not getting
anywhere."
|
|
|
|
| Article
Listing |
- Welcome
to "The Casual Kayaker"
- My
Rating System
- (B.
Everett) Jordan Lake - Farrington Point (northwest finger)
- June 18, 2011
- Paddling
in the Great Smoky Mountains, Jackson County, NC
- Bear
Creek Lake, Jackson County, NC, June 29, 2011
- Lake
Glenville, Jackson County, NC, June 30, 2011
- Wolf
Creek Lake, Jackson County,NC, July 1, 2011
- Kayaks,
Water, and DSLR Cameras - How I Manage Mine
- Our
first kayaks
- (B.
Everett) Jordan Lake, NC 751 area, July 16, 2011
- Hauling
My Kayaks - A Little Do-It-Yourself
- Waiting
out the weather
- Short
Paddle on the Coast for Wild Horses
- (B.Everett)
Jordan Lake, return to NC 751 area, November 19, 2011
- (B.
Everett) Jordan Lake - Farrington Point to Morgan Creek
- April 1, 2012
- (B.Everett)
Jordan Lake, White Oak Creek marsh, April 7, 2012
- (B.Everett)
Jordan Lake, Vista Point - north, April 14, 2012
|
INTRODUCTION
When
I first began kayaking I found a most helpful blog
by Tom Haynie that aided me greatly in finding and
choosing new flatwater locations. His blog was infinitely more
detailed and useful than anything I found on kayaking forums.
I quickly resolved to share my own impressions of locations
I've visited, including details I believe to be important and
helpful, in hopes of providing practical information to others.
I sincerely hope you find something useful and helpful here.
(For more location reports visit Tom's blog at backshortly.wordpress.com)
|
Kayaking
Links
Paddling.net
- More Locations
Paddling.net
- Launch Sites Map
Download
Google Earth (free)
My Other Web Sites-
CarolinaWildPhoto.com
CarolinaOuterBanks.com
NCWildHorses.com
GossamerTrilogy.com
|
|